
Connecting JumpCloud
Create the Trustle service account to automate privileged access management for JumpCloud
Overview
This guide will help you configure a JumpCloud API so Trustle can securely read your JumpCloud users and groups.
What you'll need:
- JumpCloud account with Administrator role
- Access to the JumpCloud Admin Panel
Step 1: Log in to the JumpCloud Admin Panel
Go to https://console.jumpcloud.com/login/admin and sign in with your administrator account.
Step 2: Create a Custom Role for Trustle Service Account
- In the left sidebar, navigate to Settings
- Click in the Administrators Tab
- Click in the Custom Roles Sub Tab
- Click to Add Custom Role

- Give a name to the custom role (eg. trustle-sa)
- Choose the “Read Only” as template role
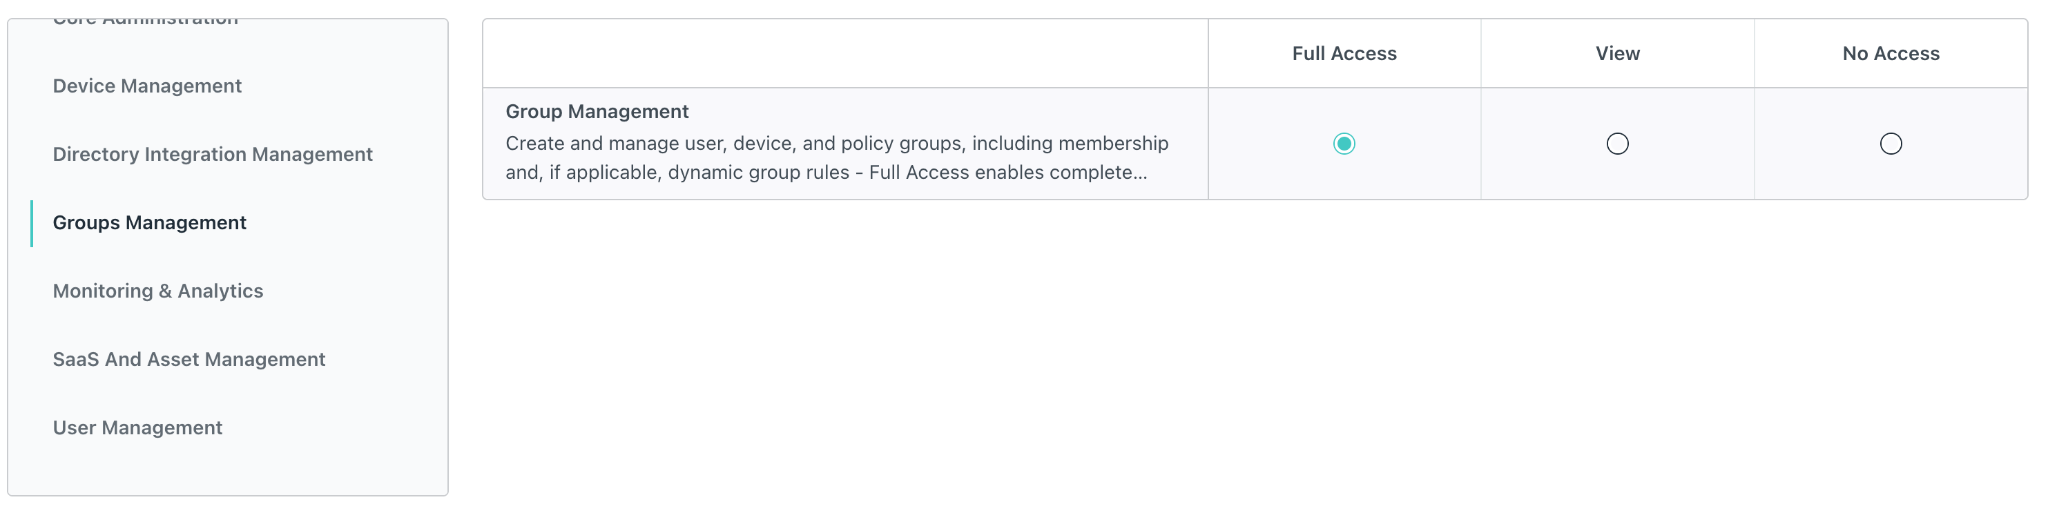
- Give “Full Access” to Groups Management Permission Category
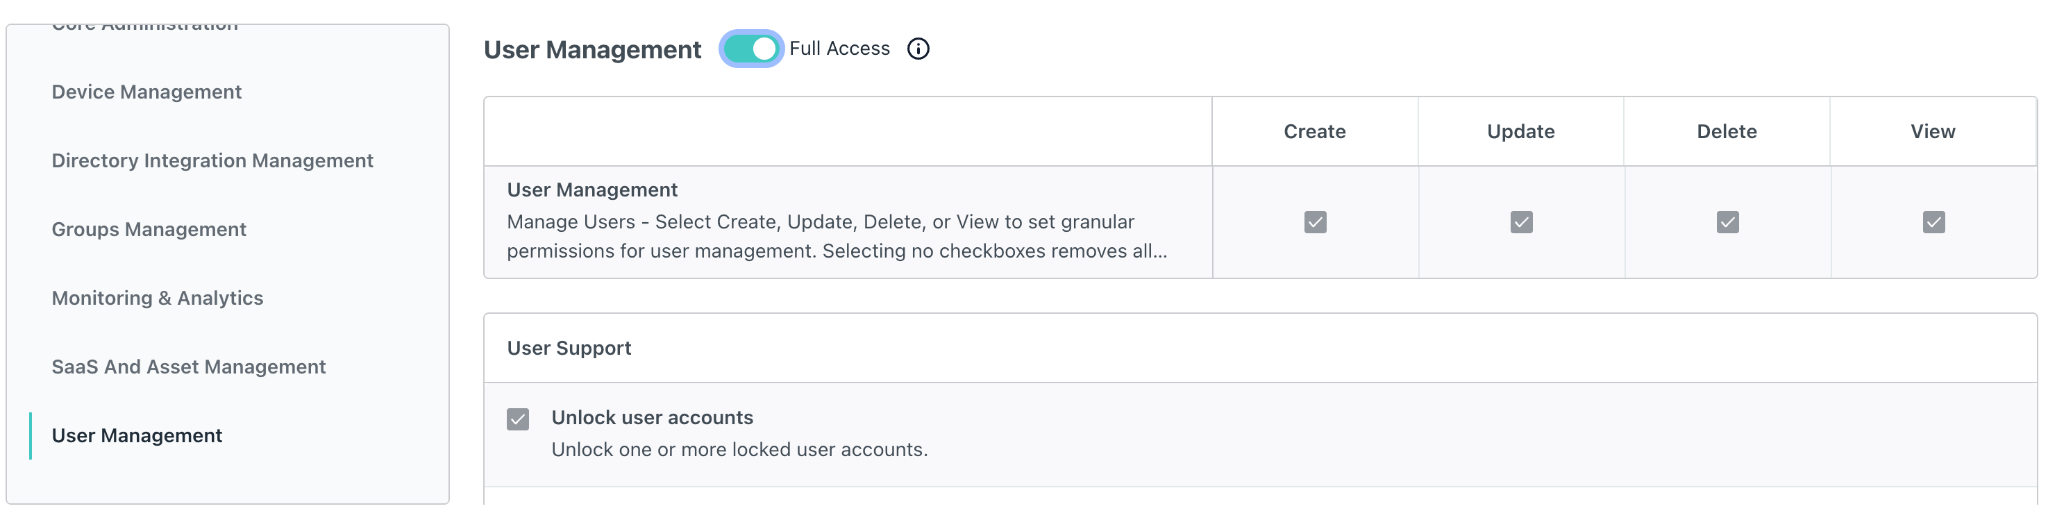
- Give “Full Access” to User Management Permission Category
- Save
Step 3: Create a Service Account
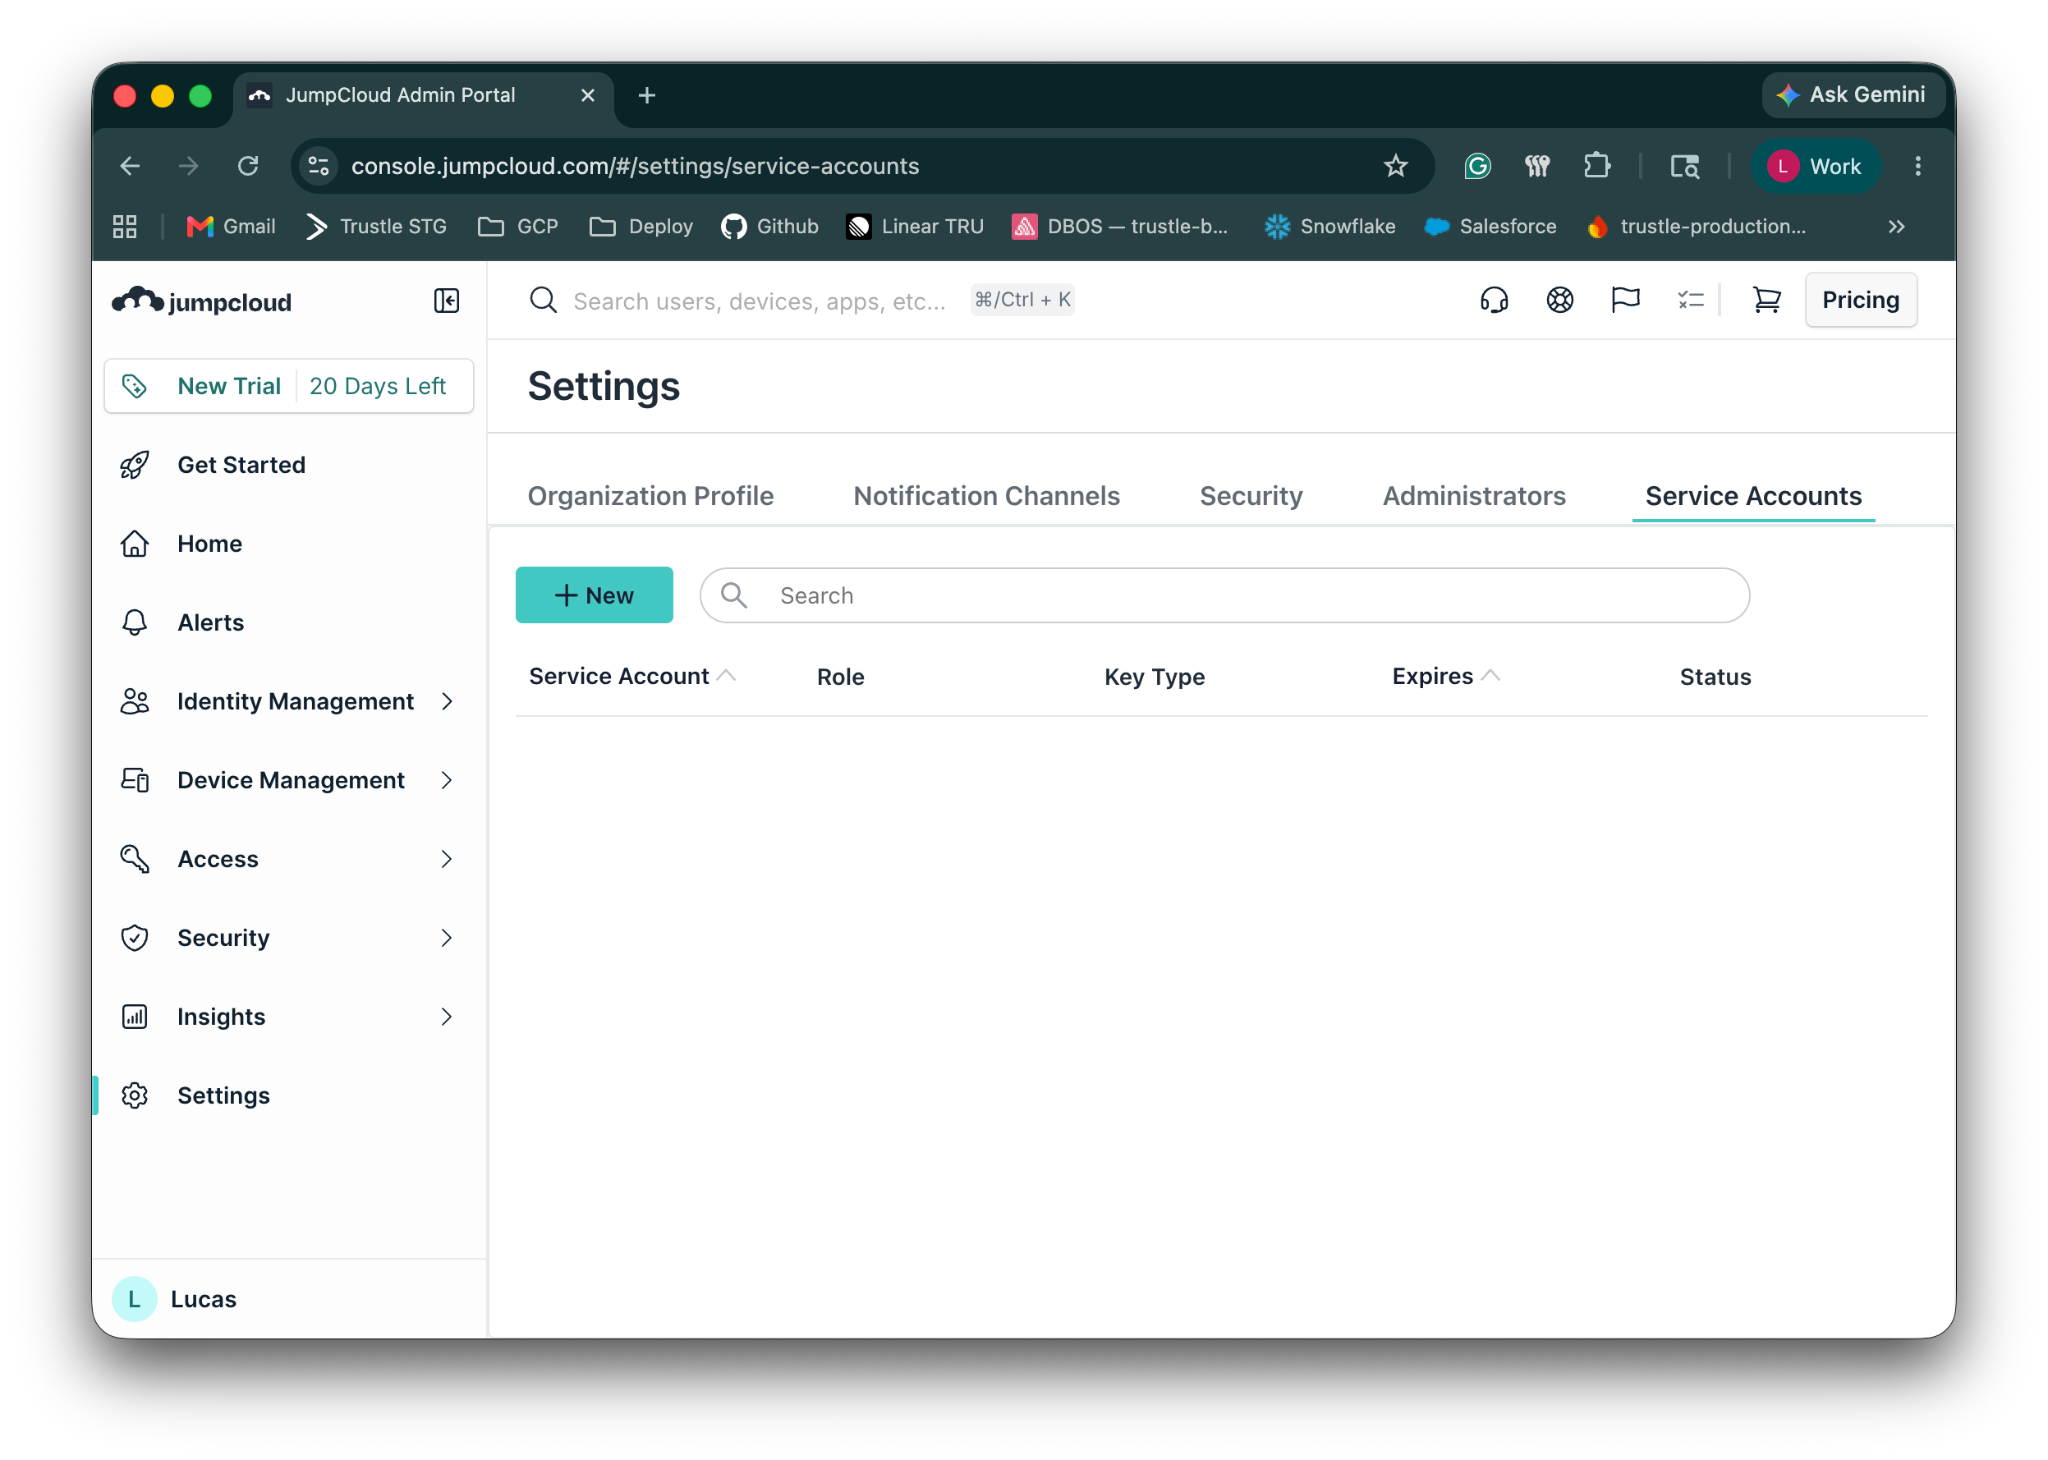
- In the left sidebar, navigate to Settings
- Click in the Service Account Tab
- Click in “New” button
- Give a name
- Select our custom role
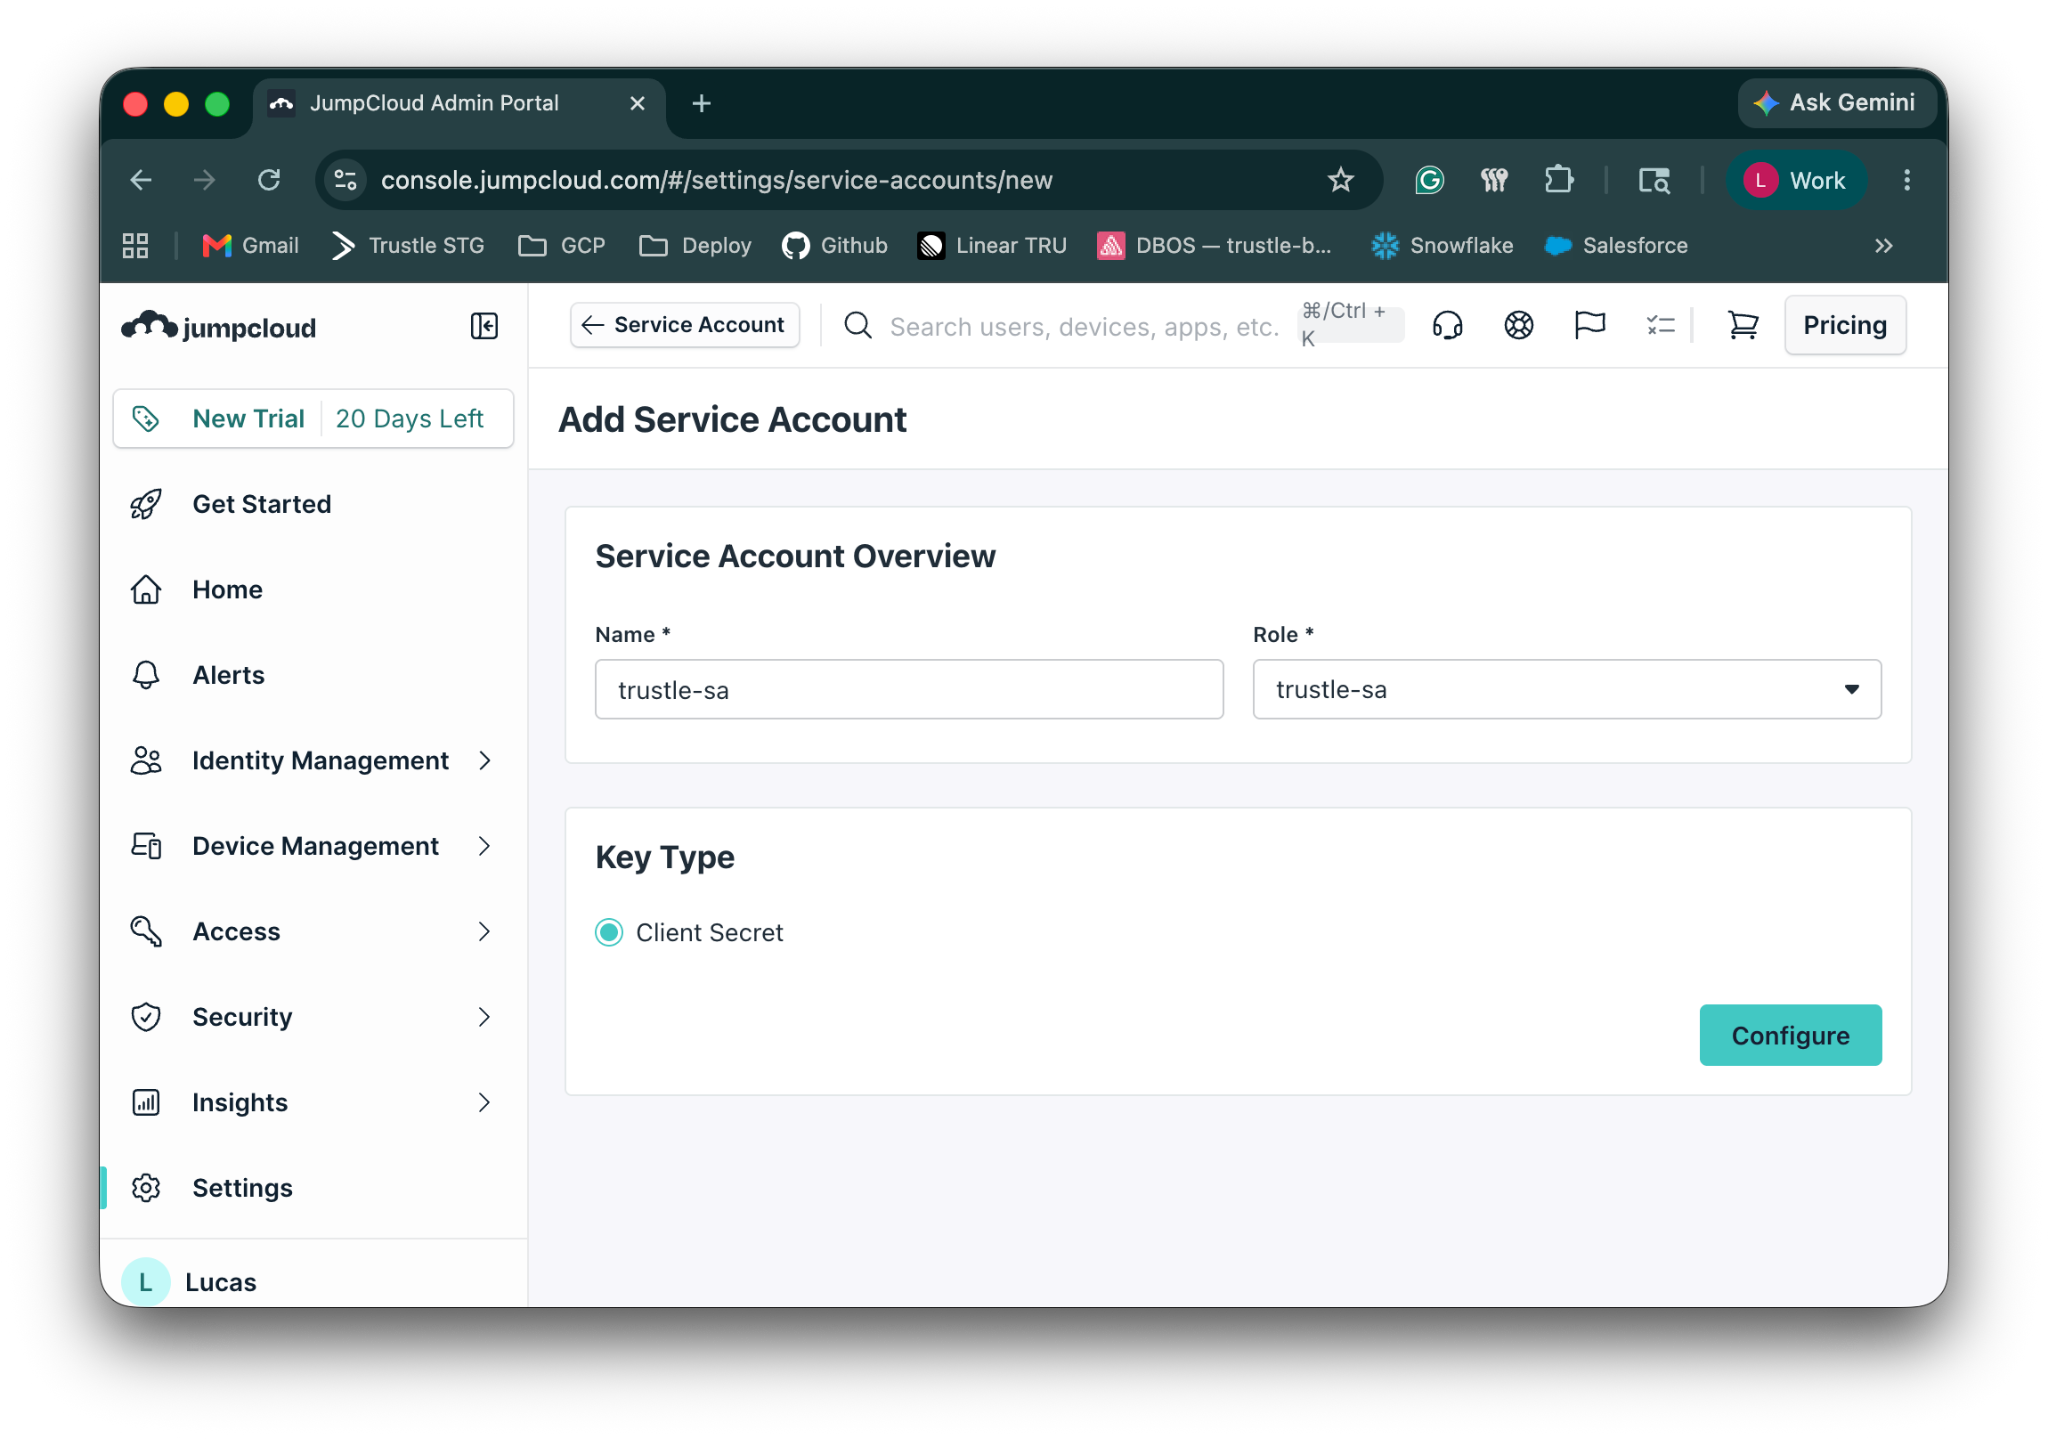
- Click in Configure
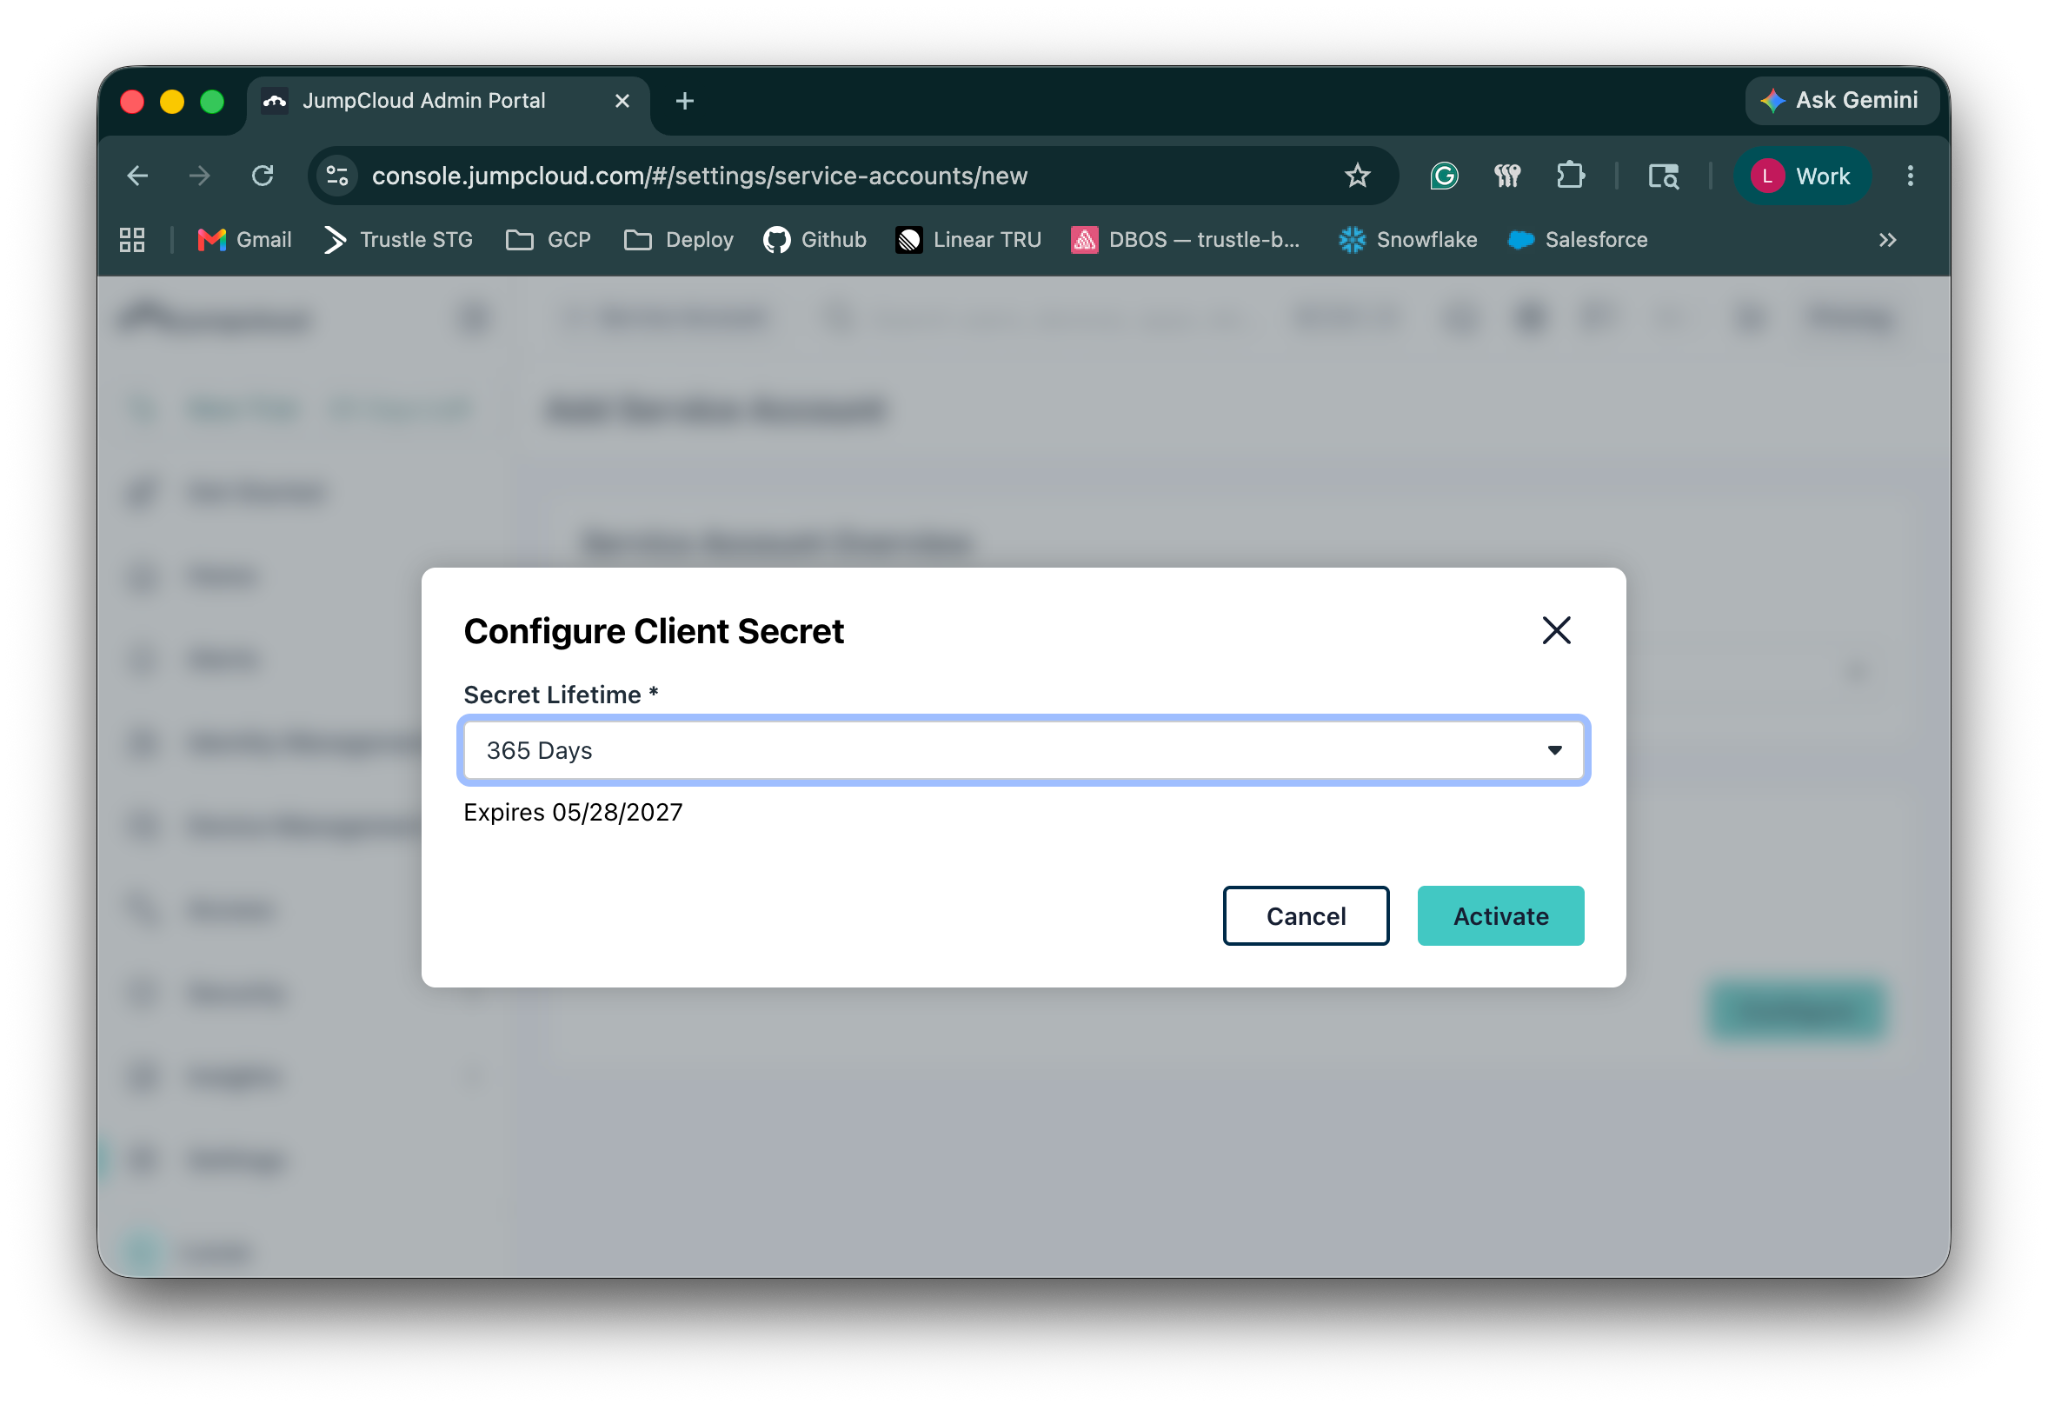
- Select the secret life time and activate
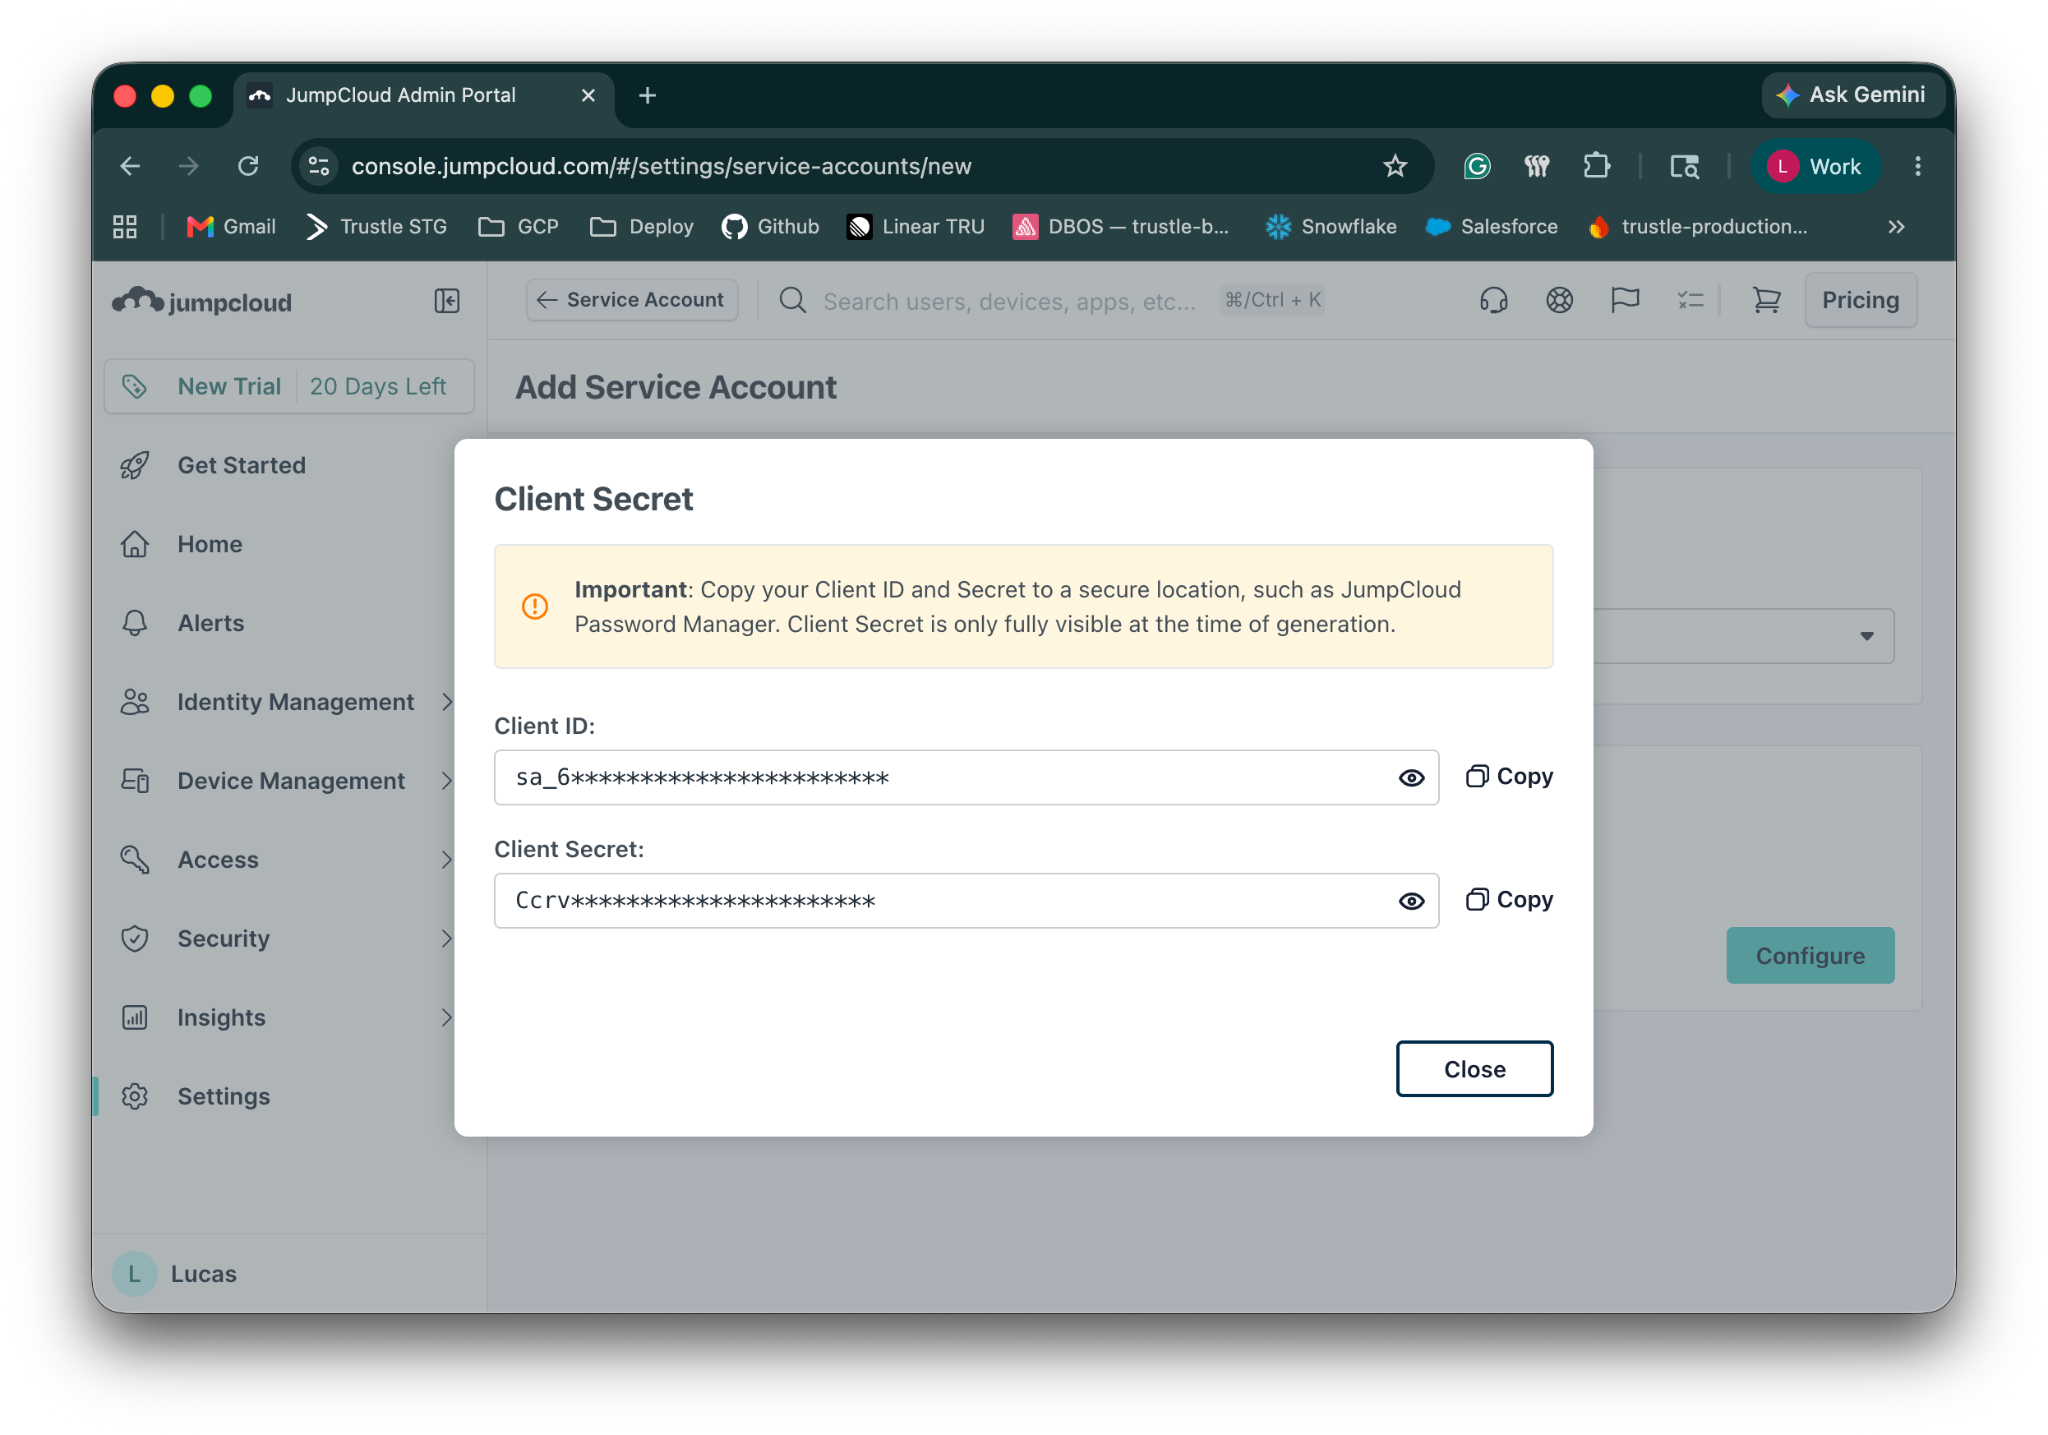
- Copy the Client ID and Client Secret
Step 4: Collect the JumpCloud Organization ID
- In the left sidebar, navigate to Settings
- Click in the Organization Profile
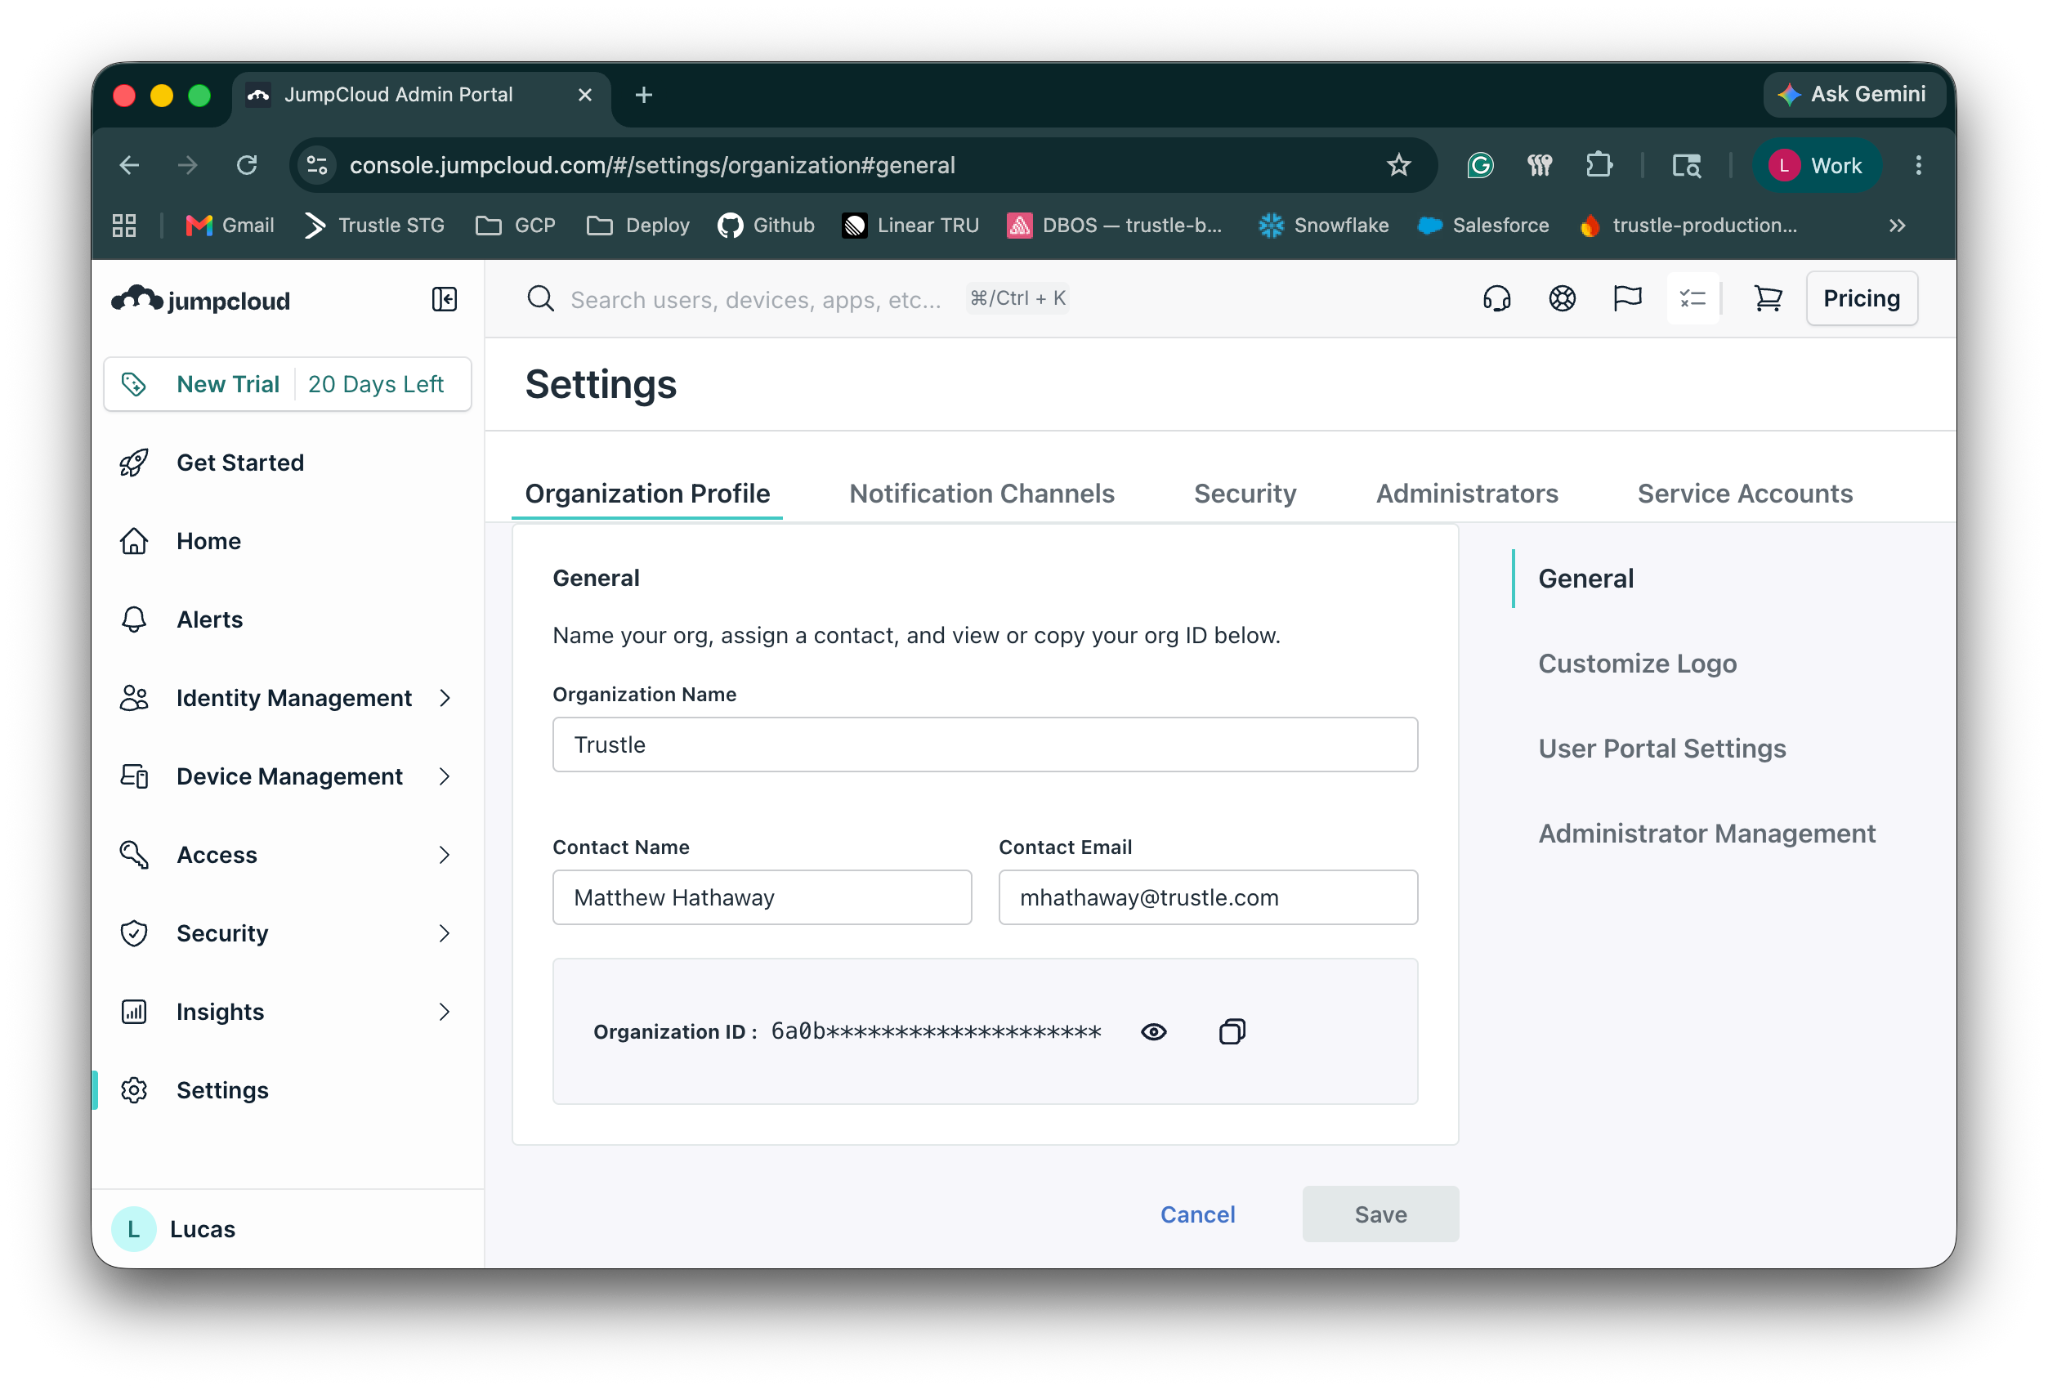
- Copy the Organization ID under the General Section
Step 5: Set up the JumpCloud Integration in Trustle
- Navigate to the Connections page in Trustle from the left menu
- Under Identity Providers, find the JumpCloud logo and choose Connect
- Fill in the connection form:
- Connection Name: Enter a descriptive name (e.g., "My JumpCloud Connection")
- Organization Id: Paste the organization id from Step 4
- Client ID: Paste the client id from Step 3
- Client Secret: Paste the client secret from Step 3
- Click Test Connection
- Upon successfully testing the connection, click Save Connection