Connecting Databricks
Create the Trustle service principal that automates JIT for Databricks entitlements
Step 1: Log in to the Databricks Console
You will need the account admin role to access the User Management panel.
Step 2: Create the Service Principal for Trustle
This flow works only for Databricks-managed Service Principals; a Microsoft Entra ID Service Principal has its own flow.
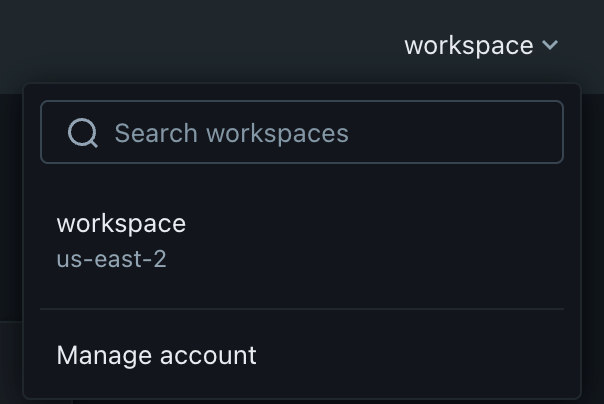
- Go to the account management console (Workspace dropdown → Manage account)
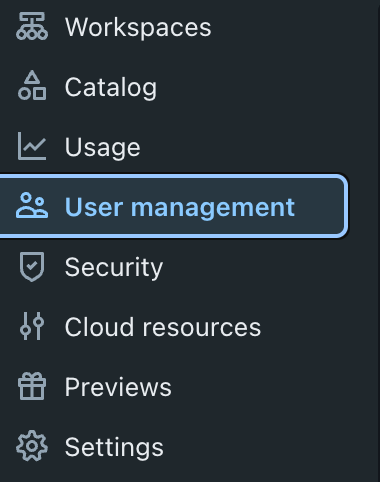
- Go to User Management (sidebar)
- Go to Service Principals (User Management tab)

- Create the Trustle Service Principal account
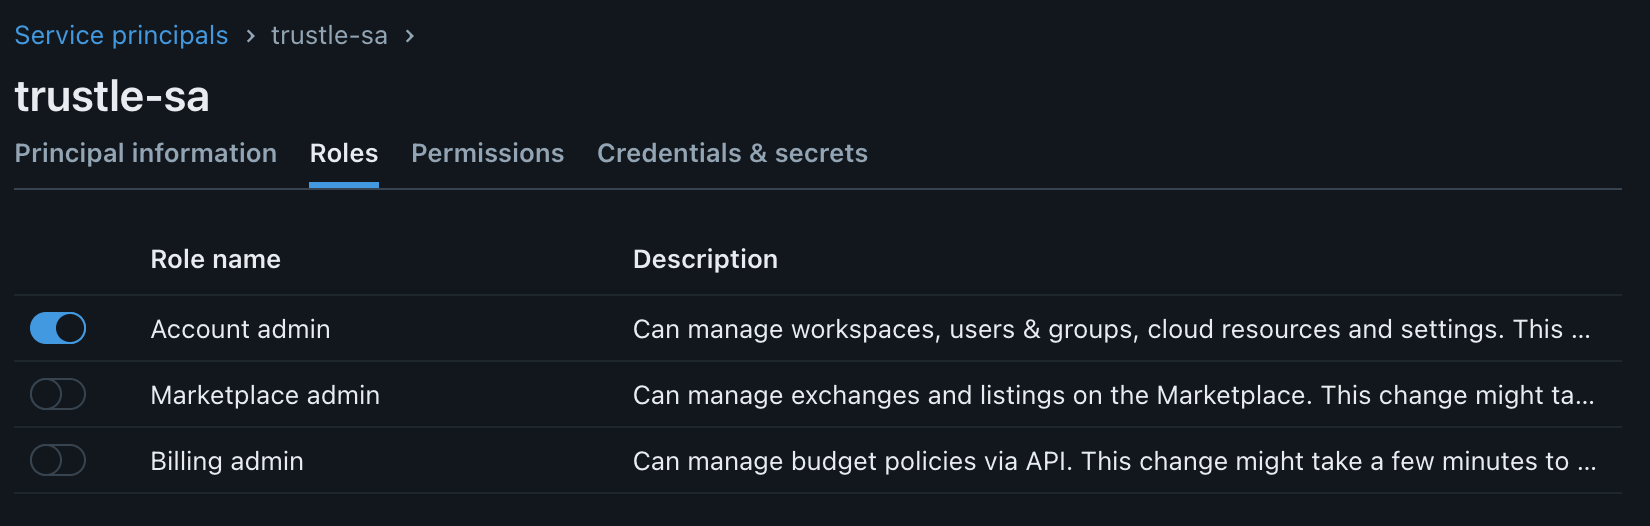
- Give the Account Admin role to the SP (Service Principal → Roles) — required so Trustle can read account-level identity (users, groups, service principals)
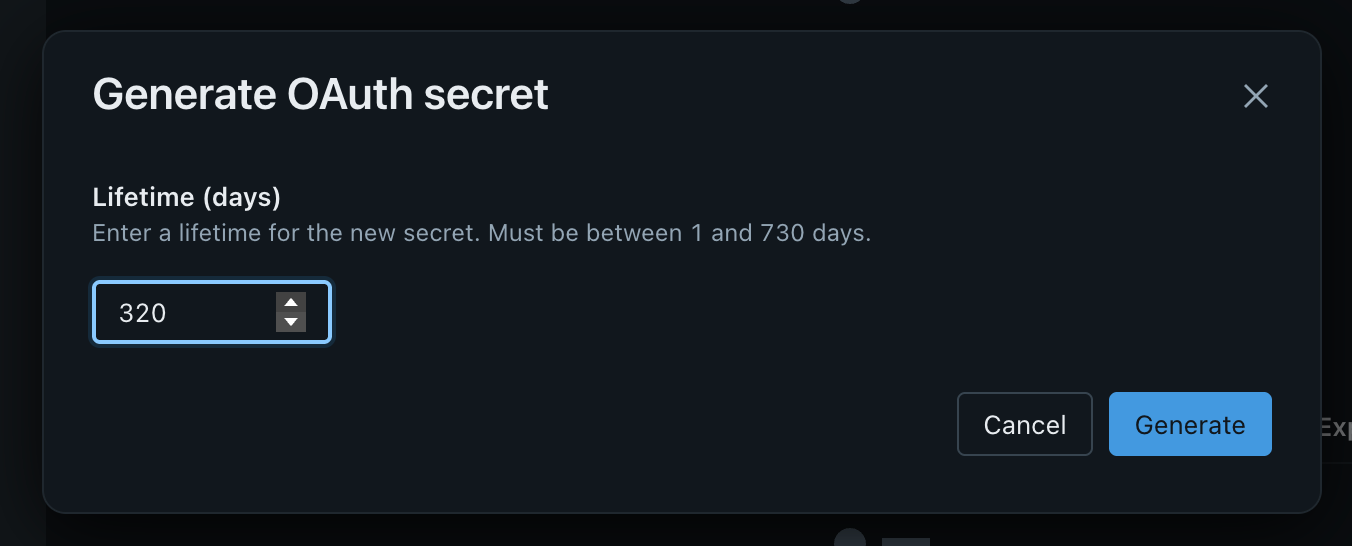
- Generate the OAuth Secrets (Service Principal → Credentials & Secrets → OAuth Secrets)
- Set a lifetime for the secret (commonly 320 days)
- Copy the Secret and the Client ID to use in the Trustle connection
Step 3: Grant the Service Principal Metastore Admin
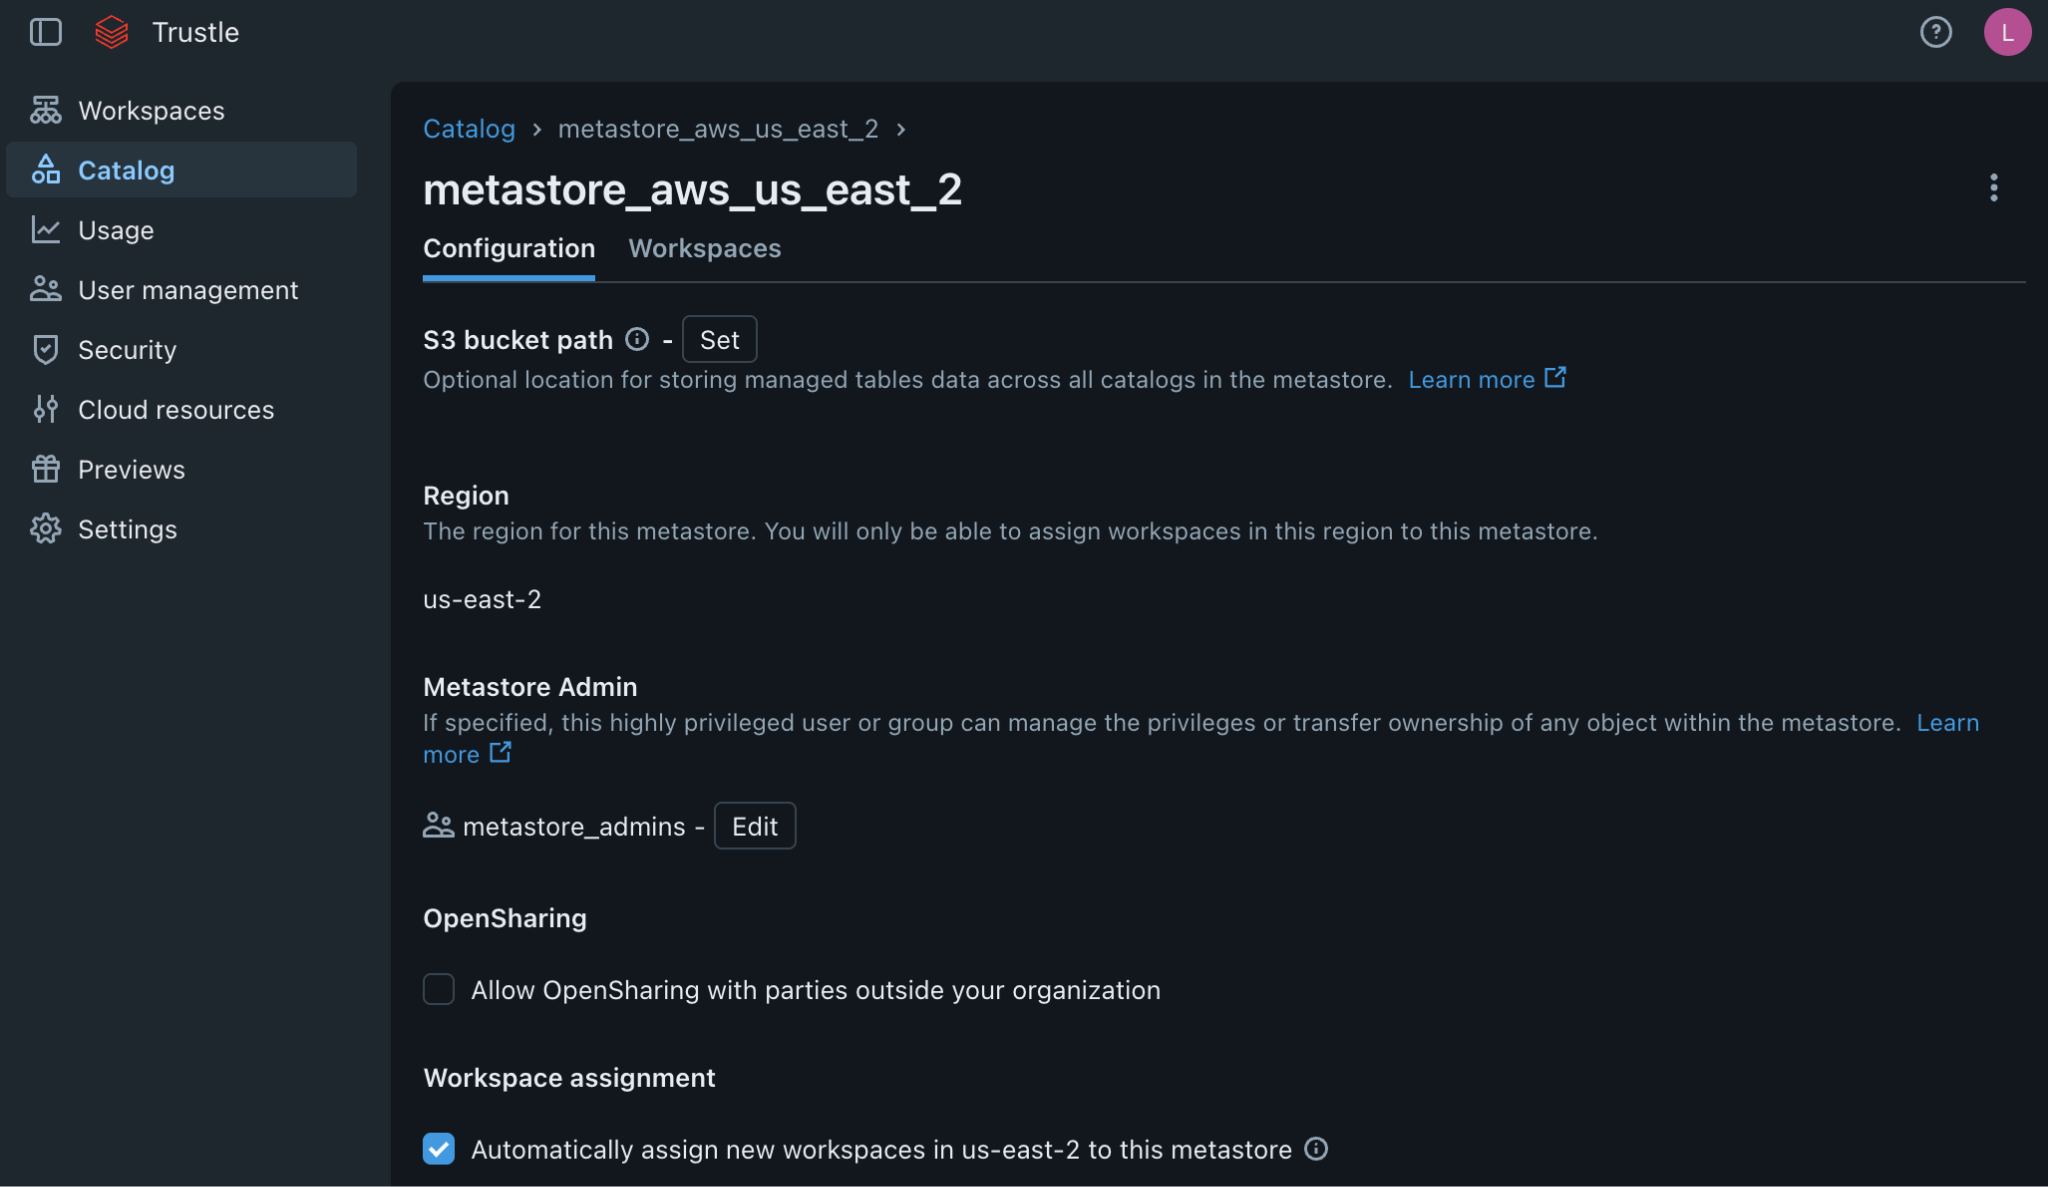
Account Admin does not grant visibility into Unity Catalog objects — {catalog}.information_schema only returns rows for objects the querying principal can see. For Trustle to discover all catalogs, schemas, tables/views, and grants, the service principal must be a metastore admin. The metastore admin is a single owner "slot," so assign it to a group (this lets multiple admins coexist without overwriting each other).
- Create an account-level group (if you don't already have a metastore-admins group).
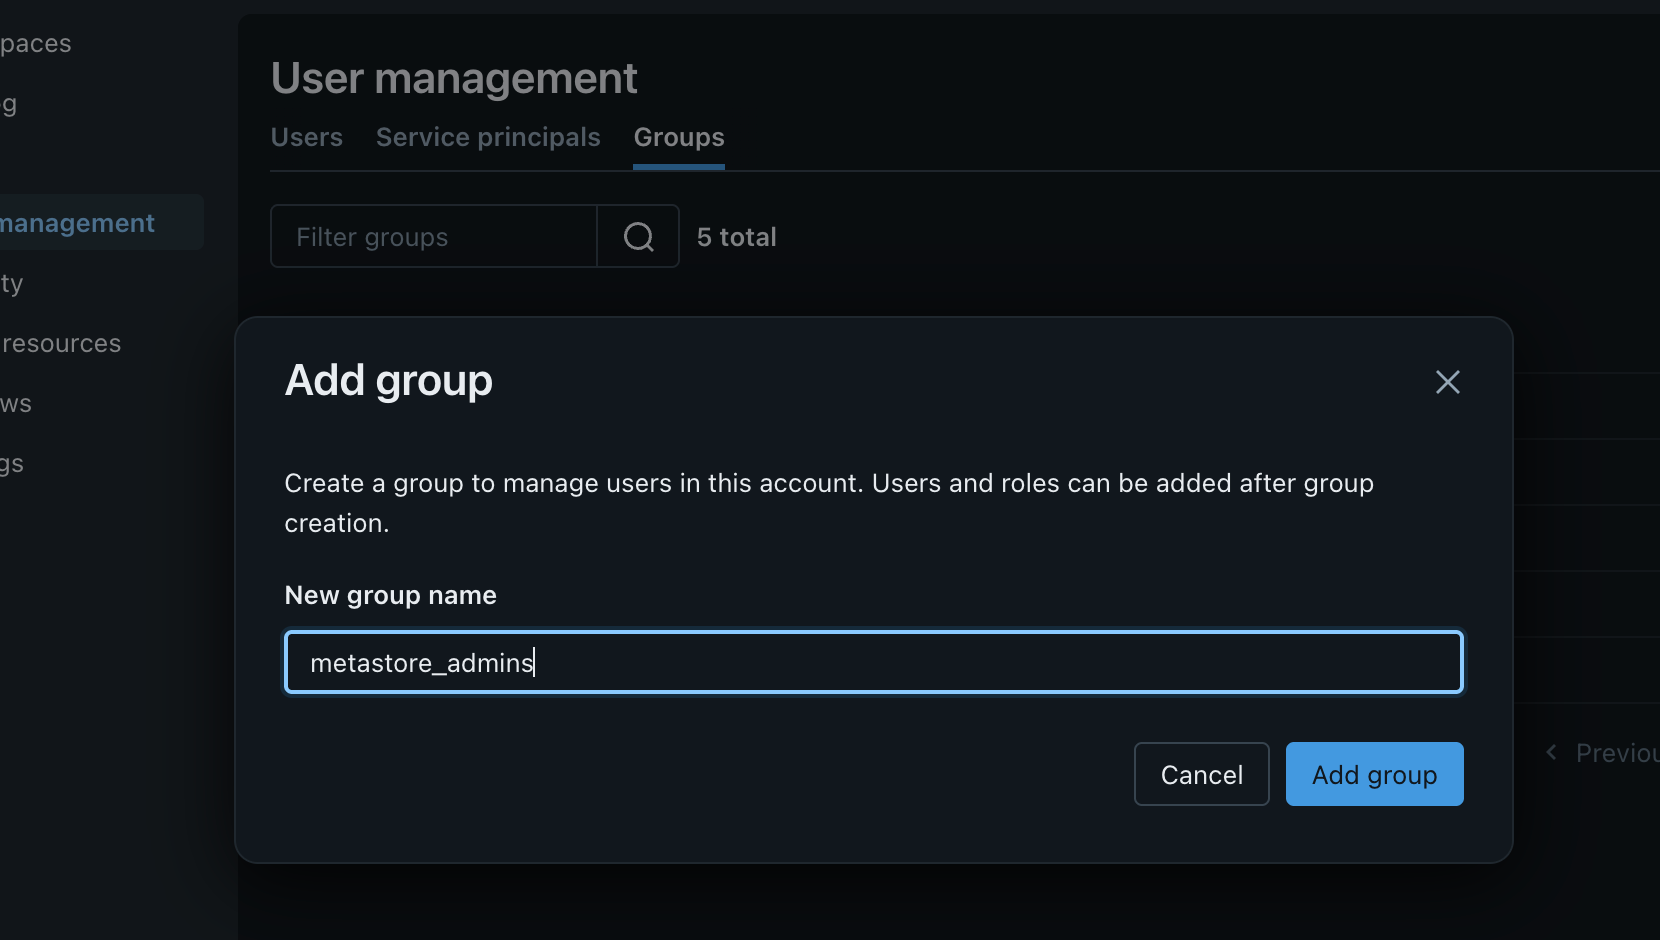
- Add the Trustle Service Principal to the group.
- Go to the target metastore (Account console → Catalog → open the metastore you want to add the admin group)
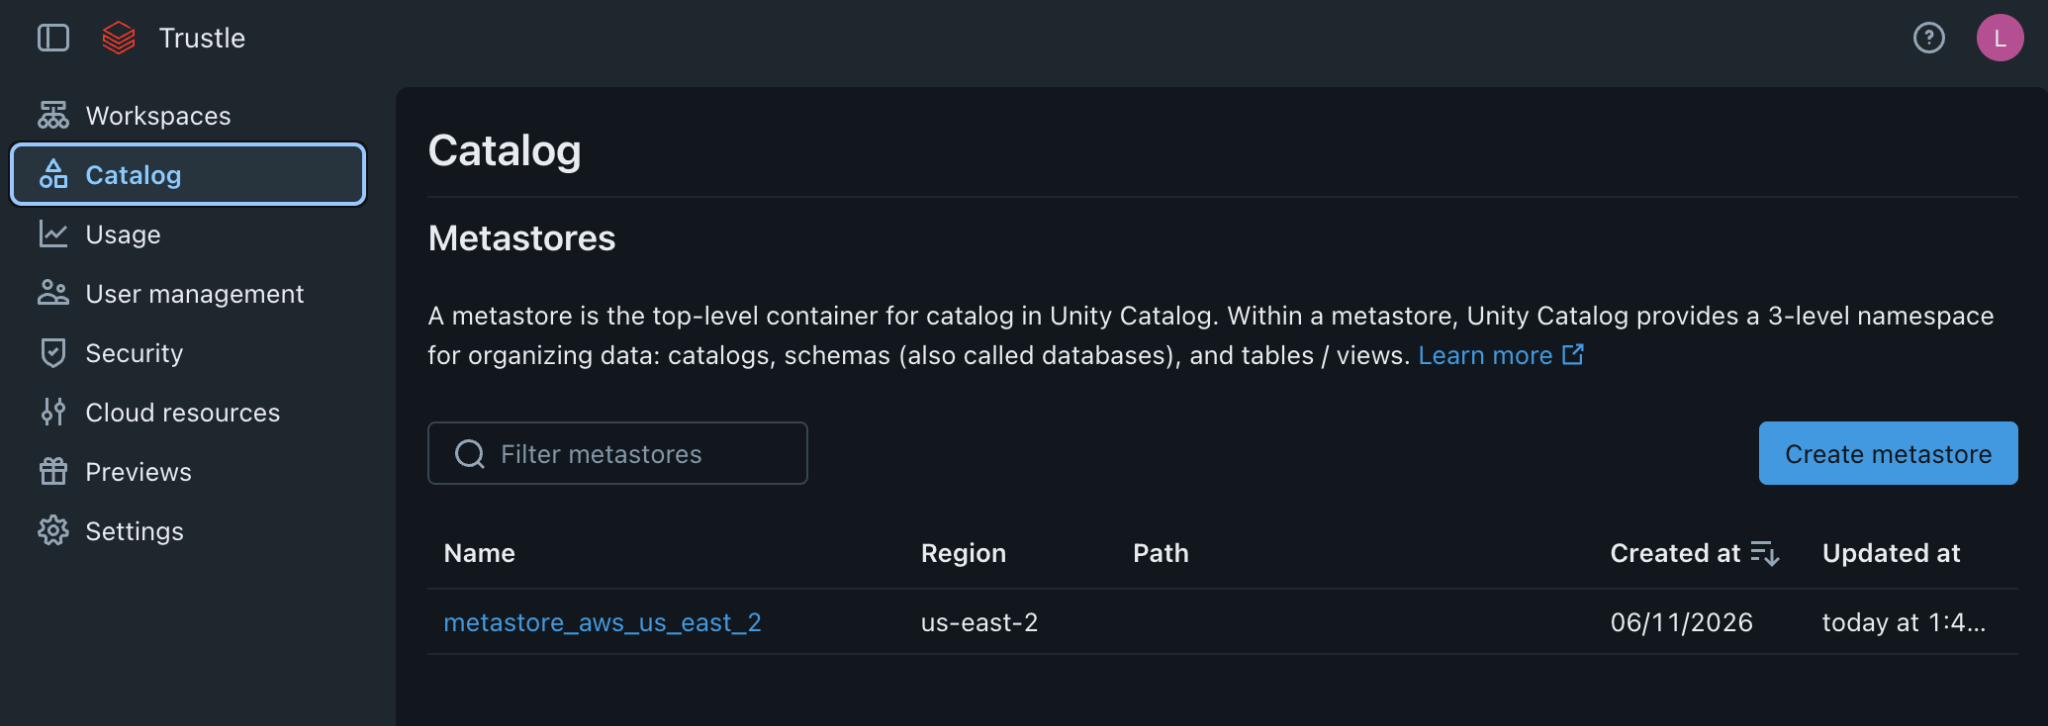
- Assign the group as the metastore admin (Account console → Catalog → open the metastore you want to add the admin group)
Step 4: Collect the Workspace URL and SQL Warehouse ID
Trustle runs its Unity Catalog discovery queries through a SQL warehouse in one of your workspaces.
- Workspace URL: Account console → Workspaces → open the workspace you want Trustle to use → copy its URL (e.g. https://dbc-xxxxxxxx-xxxx.cloud.databricks.com, or your Azure/GCP equivalent).
- SQL Warehouse ID: In that workspace → SQL → SQL Warehouses → open the warehouse → the ID is in Connection details (also visible in the URL: /sql/warehouses/<warehouse-id>).
- Grant the service principal access to the warehouse: on the warehouse → Permissions → make sure the Trustle service principal ‘Can use’.
Step 5: Collect the Account ID
In the top-right user menu of the account console → Copy account ID (a UUID). (Also visible in the console URL.)
Step 6: Collect the Account Host
Copy the account management URL (from Step 2 — one of the below):
Cloud -- Account Host
AWS -- https://accounts.cloud.databricks.com
GCP -- https://accounts.gcp.databricks.com
Azure -- https://accounts.azuredatabricks.net
Step 7: Set up the Databricks Integration in Trustle
- Navigate to the Connections page in Trustle from the left menu
- Under Identity Providers, find the Databricks logo and choose Connect
- Fill in the connection form::
- Connection Name: a descriptive name (e.g., "My Databricks Connection")
- Account Host: the host from Step 6
- Account ID: the account ID from Step 5
- Client ID: the Client ID from Step 2
- Client Secret: the client secret from Step 2
- Workspace Host: the workspace URL from Step 4
- SQL Warehouse ID: the warehouse ID from Step 4
- Click Test Connection
- Upon successfully testing the connection, click Save Connection